crystalfisk282
Member
Beauty. Nice make up guide. Love it
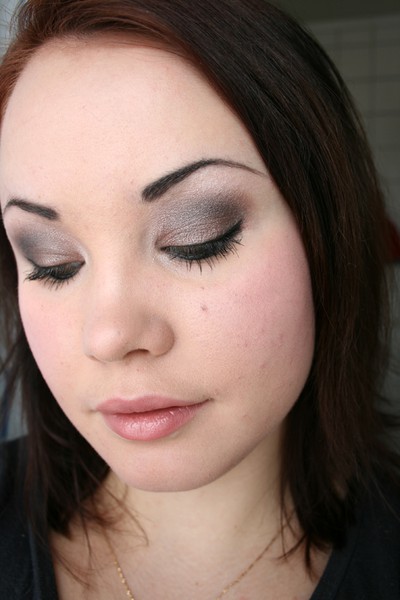
I thought I'd share a tutorial on a quick and easy smokey eye I've been rocking a lot for the past few weeks
Products used:
Face
Eyes
- MAC prep + prime skin
- MAC select cover up concealer - NW20
- MAC studio fix fluid foundation - NW20
- MAC cremeblend blush - so sweet, so easy
- MAC Fix+
Lips
- UDPP
- MAC eyeshadow - carbon
- MAC eyeshadow - satin taupe
- MAC eyeshadow - phloof!
- MAC kohl power eye pencil - feline
- MUS tri brow colour
- MAC fluidline - blacktrack
- MAC plush lash mascara
- H&M brow fix
- MAC lipstick - patisserie
Step 1 - Start with a clean and moisturized face. Apply your base of primer, concealer and foundation, and also apply a cool toned pink creme blush (I've used so sweet, so easy cremeblend blush from MAC) before you fix everything with powder. I explain more in detail how I do my base here.
Step 2 - When the base for the face is done, it's important to apply a good eye primer so that your eyeshadow will stay in place the entire day and not crease on your lid. With a good primer, the shadows will stick much better, and the colours will be more vibrant than they would be on bare skin. My favourite eye primer is Primer Potion from Urban Decay. I apply 2-3 lines with primer on my lid using the applicator, and then I smudge the primer over the entire lid with my finger
Step 3 - apply some loose powder underneath your eye, to catch up any fallout from the eyeshadow during application. The fallout will be easy to brush off later together with the loose powder
Step 4 - Press a medium taupe eyeshadow onto the entire lid with a flat, dense eyeshadow brush. I've used the eyeshadow Satin Taupe and brush #239 from MAC.
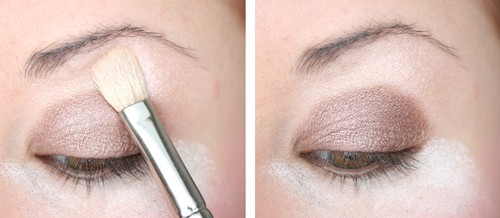
Step 5 - Sweep on a shimmery, light highlighter eyeshadow on the brow bone with a fluffy blending brush for a sheer result. I've used the eyeshadow Phloof! and brush #217 from MAC.
Step 6 - Blend the sharp line of the eyeshadow you applied on the eyelid with the same fluffy brush you used to apply the highlighter with in sweeping, rubbing motions for a soft gradient.
Step 7 - Pick up a matte black eyeshadow on a large, fluffy brush and apply it with sweeping motions in the crease and outer v. Rather use a smaller ammount to begin with, it's easier to apply more than to remove it! I've used the eyeshadow Carbon and brush #224 from MAC.
Step 8 - Brush off the loose powder under the eye. Apply a black kohl pencil along the lower lash line and on the waterline. Blend the brush with an eyeliner brush or a q-tip and fix it with a black eyeshadow to prevent smudgeing. I've used the kohl pencil Feline and the eyeshadow Carbon from MAC.
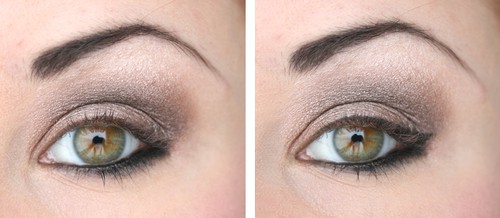
Step 9 - Fill in your eyebrows and apply a black eyeliner along the upper lash line. I've used MUS tri brow colour for the brows and MAC blacktrack fluidline as eyeliner, and I've used the flat angled brush #208 from MAC for both brows and liner.
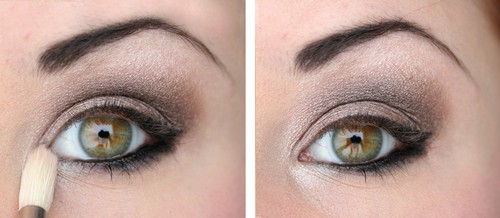
Step 10 - Apply a highlighter eyeshadow in the inner corner of the eye with a round brush with long bristles. I've used the eyeshadow Phloof! and brush #222 from MAC.
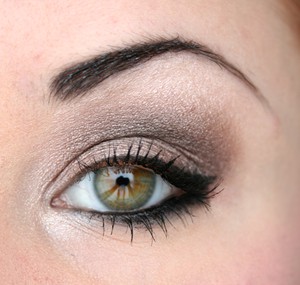
Step 11 - Apply two coats of mascara on both upper and lower lashes. Fix your eyebrows with brow fix. I've used the mascara Plush lash from MAC for my lashes and Eyebrow fix from H&M for the brows.
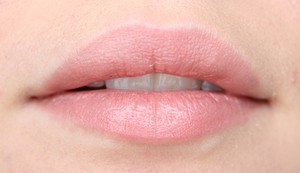
Step 12 - Apply a sheer nude lipstick. I've used the lipstick Patisserie from MAC.
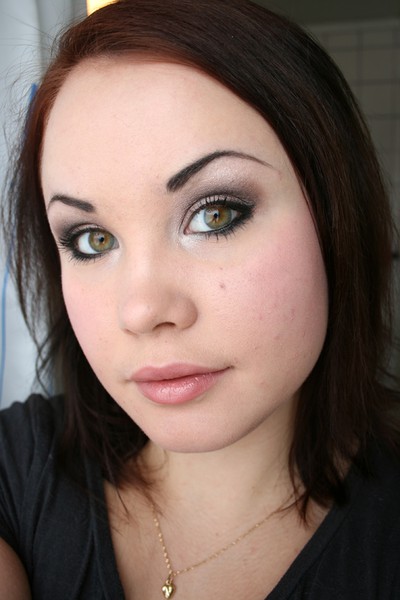
Step 13 - Spray your face with a glycerin spray and buff it in with a large powder brush to moisturise and get rid of the powdery look. I've used Fix+ and brush #150 from MAC.
